Friday, July 24, 2009

My Most Precious Studio Supplies


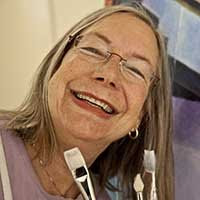
I know this is a slightly out of focus photograph (maybe more than slightly), but the brushes are more than slightly worn, so the fuzziness may be more flattering. These are my favorite brushes, Windsor Newton Lexington II's. They're not expensive. The bristles have just the right amount of stiffness combined with springiness for my style of working. The bristles are just the right length. I love the rounds and the flats and the filberts and every other style they make. I'm very hard on brushes. I scumble a lot. This means that I scrub the brushes over the surface of the painting. It wears the bristles down. I don't particularly like a brand new brush. One that is well broken in is just perfect. It's wonderful for awhile and then suddenly, it's just too worn out. Kind of like a good haircut that is best after the first few days, great for weeks, and then all of a sudden almost overnight, way too shaggy.

Which brings me to a little paranoia. It seems that my brushes break down in a group. I'm going along just fine and then suddenly one day, a bunch of my favorites have just had it. I panic. Lexington II's aren't the easiest brushes to find. My favorite art supply store, Arizona Art, carries them. But only at the store in Phoenix, a 2 hour drive away. If I think ahead, I can order them from the local Tucson Arizona Art Supply and the brushes will arrive in a few days. Somehow, I never get around to going online to figure out where else to get them, probably because I don't think about it unless I'm in crisis mode. None of the catalog stores I use carry them. I've looked at other art stores, to no avail. This is when I get real nervous. What if Windsor Newton has stopped making them? Then what will I do? It's the stuff of nightmares!


On the other end of things are the feet. Mine hurt. They hurt a lot. It's probably because I taught art in a facility with a concrete floor. And I lived in a home with a concrete floor. Then I moved to an apartment with a concrete floor and acquired a studio space with, yes, a concrete floor. Now my brand new studio, which I love, also has a concrete floor. A normal person would just sit down. I rarely sat down when I taught art. I even more rarely sit down to paint. Sitting just isn't something I do well.

What you see above are a pile of life savers. They are FitFlops, a sandal from England, sold in the USA. I'm not sure what it is about them that works so well. Believe me, I've experimented with just about every shoe style and brand known to man. I discovered FitFlops last year via an add in the New York Times. Having been burned too many times to count by shoes that feel great for the first 1/2 hour and then no longer hold the promise of comfort, I was dubious but curious. I bought my first pair. It was like a miracle. No more foot pain. And the comfort continued on, month after month.

Paranoia kicked in again. What if the company goes under? What if they repurpose the style or change materials? Hence, the pile you see in the photo. I currently have 5 pairs of FitFlops. They are worth their weight in gold. I'm thinking I'd better get to the store to pick up just a couple more pairs, just to be safe.

Friday, July 17, 2009

Balancing Act: I Can't Wait! Working in the Studio vs. The Business of Art


I try to create a post for my blog twice a week. Sometimes it happens, sometimes it doesn't. This past week and 1/2 has been busy with visitors. When we lived in Ajo, way, way in the boonies of the desert of southern Arizona, a (very) few intrepid friends made the trek to see us.

One of the things I hoped for when we moved to Oracle, is that our friends might be more inclined to visit. In reality, Oracle is the same distance from Phoenix, but because it's just north of Tucson, there's the appeal of a really interesting city nearby. Plus, living at 4500 ft. elevation means that we're cooler here, a real incentive for Phoenicians, and less of a disincentive for other friends from cooler climes, to come visit.

So, my wish is coming true. Which brings up the title of this post, Balancing Act. And yes, it is. A balancing act.

The act of entering the studio and getting to work can be daunting. So much rides on the success or failure of every creative attempt. It's hard to ignore the cost of the materials required to do the work. Studio work has to go hand in hand with figuring out how to manage an art career, which includes marketing and selling art, and many other tasks. And then there's doing the laundry, cleaning the house, and making time for friends and family.

A true juggling act.

The photo above is a beginning and a finishing. I just started the painting on the left. If you look back at previous entries, I've been working on the painting on the right for some time. I'm not sure how long, because while I intended to track my time on this one, it didn't happen. Yesterday, when I entered my studio, I thought a few small touches would complete the painting. Hours later, I was still working on it. When I go to look at it today, I hope I'll be able to call it done, and begin to concentrate on the painting you see below.

I've just finished the fun stage of this one, where everything seems possible. I literally dash paint onto the canvas, keeping it loose and experimental. Next step is to look at proportions and angles and begin to work with color.


The next step for the painting above (assuming it will stay finished) is to sign it, title it and photograph it. (A real, James Cowlin photograph, professional and accurate). Then I enter it into my Bento record of paintings, with dates, size, title, media, price, location. Next I'll enter it into my various on-line galleries and websites. This, too, is time consuming and not so fun. But necessary in keeping track of my work.

I'm grateful to Alyson Stanfield, my guru of all things art business related. Her book, I'd Rather Be in the Studio: The Artist's No-Excuse Guide to Self-Promotion, has been instrumental in my progress in balancing the art in being an artist with the business aspects. I have an accurate record of my work, thanks in large part, to the suggestions in her book. Her weekly newsletter helps to keep me on track. You can view her website and subscribe to the free newsletter at Alyson Stanfield's website.

A new book, The Artist's Guide: How to Make a Living Doing What You Love, by Jackie Battenfield is a great companion book to Alyson's. I just finished it, and I love her approach. Now I need to start at the beginning of the book and follow her advice!

The reality of being an artist is that more than 50% of time has to be spent on the business aspects of the art practice, in order to move ahead in an art career.

Which brings me to the point (at last) of this blog post: I'm continuing on the theme of what it takes to be an artist. It's not just all fun and games. It's lots of hard work and like any job, includes plenty of stuff that you'd just rather not do. The difference is that because it's completely self directed, it takes buckets of determination both to make the art, and to promote it. Balancing the art making, art promoting, and the rest of life is an art form in and of itself!

Tuesday, July 7, 2009

Procrastination: Painting Progress Report


After many hours of work (too absorbed to track my progress with my camera), this is what I have so far. You can check back a couple blog posts if you'd like to check out where I started with this painting. It's still far from complete. It's at the stage where I think it'll take a few hours to finish, but ends up taking days. It always happens, and I never seem to learn.

Documenting my progress is part of my resolve to learn to explain my work and my method of painting, so that when people ask questions, I have worked out some logical answers. This, instead of stammering and telling them that I really, really need to think about how to describe my paintings and process.

Actually, the reality is that I'm stalling. We were on the road last week, working on the US Route 89 project, http://www.us89society.org. After being totally absorbed in that, I find it difficult to switch gears and get back into my studio. I know that once I force myself to enter that space, I'll get right to work and wonder what the problem was. It's the getting in there that is hard. It's like a brick wall I have to force my way through. You'd think someone was waiting to torture me on the other side of that door, when in reality, what waits is what I love to do.

Wednesday, June 24, 2009

A Major Distraction (but fun): #mailart


So here's the deal. I tweet. Yes I do. It's really quite addictive. I follow quite a few artists who also tweet. Via these contacts, I got involved in a Mail Art project. 33 artists from the USA, Australia, UK and Canada are doing a postcard exchange. Everyone creates 32 unique postcards to send out. And everyone should receive 32 unique postcards from people all over the world.

I signed up, not quite realizing what a time commitment it would be. Of course, creating an involved postcard process added to the time. For some reason, doing something with thin plexiglass stuck in my head. So I ordered some from Dick Blick.

Step 1: cutting the plexiglass to postcard size. I did this by carefully measuring and then scoring each piece with a mat knife. The excess was snapped off with a pair of pliers. When lucky, there was a clean edge, when not so lucky, it was ragged and needed more snapping. Then I used a file to round the corners, and smooth the edges so they wouldn't be sharp.


This is the back of one of the cards. Didn't realize that this side didn't need to be embellished, too. So I did something unique on the back of each one I sent. By the way, this card went to Mark Phillip Venema, Art_News, the Canadian artists who organized the project.

Anyway, on to

Step 2: Measured 11 spots on the top and bottom (long sides) of the plexi, and drilled small holes.


Step 3: Cut backing paper from scraps of Strathmore drawing paper, to postcard size. I did this assembly line style, cutting a dozen at a time.

Step 4: I worked in Photoshop to resize images of my paintings, starting with the Nooks & Crannies series. There are 12 of these. I printed 6 per sheet of paper on my trusty Canon printer.

Step 5: I cut each sheet into pieces, leaving a 1/2" border around each print.

Step 6: I looked through piles of paper scraps, looking for just the right color/texture/pattern to go with the particular image.

Step 7: I cut a window into the colored paper, leaving a 1/4" border. Then I centered the print on the white Strathmore and glued it down.

Step 8: Next, I glued the colored paper onto the Strathmore, trying to get the window straight around the image. This was tricky.


Step 9: I stacked the backing paper w/ image on top of the plexiglass over a piece of foam core. and used an awl to punch holes through the backing, lining up with the holes in the plexi.

Step 10: I used colored phone wires I was given years ago and have been lugging around from place to place, to stitch the front to the back.


Step 11: I flipped it over, addressed it, and added a message and some decoration.

Step 12: When I finished 6 of them, I took them to the post office to mail off.


I really intended to just do 12 this way, and then figure out some other creative thing to do for the remaining 20 postcards. But.... it really took a long time to figure out how to create what you see. Each step was a learning process. So, I decided to continue in the same vein.

What you see below is the image of a painting not from the Nooks and Crannies series.


I ended up sending out 32 postcards with 32 tiny images of 32 of my paintings. The whole process took about a full week of long days to make.

So far I've received 5 postcards from the #mailart group. Every day it's exciting to go to the post office, open our box and see what's waiting for me.

Now, I really really need to switch gears and get back to painting!

Monday, June 22, 2009

That Painful Middle Stage, and Finishing a Few


I got a little panicky when we scheduled several trips for the US Route 89 project that Jim and I are working on. Looking at the calendar, it turns out that I'll only have about 3-4 weeks to finish paintings for my solo show coming up on September 2 at the Burton Barr Library Central Gallery in Phoenix.

Ever the organizer, Jim suggested I make a list of the Nooks & Crannies paintings and note what stage they're in. So he helped me make a check list. I have some paintings completed and photographed. Some are close. One is done but isn't photographed. Many are in the middle stages of work. Two are planned, but not started.

What you see above is my first level of attack. I pulled down 2 paintings which were done and photographed, but I hadn't painted the edges or signed them. They are sitting face up on my table as the edges dry. They are done! 2 to check off on the list.


This is the current painting, in that painful middle stage. You can check back to the past 2 blog posts to see how far I've progressed. I meant to keep track of the time, but have already failed to do so. I'm guessing I have about 12 hours into this piece.

Today, I think I'll complete a few more paintings that just need the edges done. It feels so good to get something finished. And checked off on the list. Then I'll launch back into this one again.

I'm at the point where I'm not sure where I'm going with this and just feel like I'm applying paint willy-nilly. It would be worse if I wasn't aware that this is a pattern I go through. I'll spend days adding and subtracting paint, moving things around, wondering what the heck I'm doing. I just have to force myself to keep on and believe that something will come of all this agony and work. (besides sore feet, that is).

Wednesday, June 17, 2009

Moving Along, Stage Two of Painting


In my last blog post, I decided to photograph my progress on a new (yet untitled) painting. What you see above and below are paintings in what I consider the 2nd or middle phase of development. On the top photo, I've used tape to "redraw" the angles and shapes and to straighten out the edges. Painters tape is something I started using a lot with the Nooks & Crannies series. I find it helps me to visualize where I'm going. I should have taken the time to take a photograph with the tape on, but I was deep into working and didn't think of it.

In addition, I've started to work with value and color. At this point, I'm probably at least 6 hours into the painting process.


I decided that the wall on the left and in the middle (with banister) needed some texture. I made a mixture of Golden fine pumic and coarse pumice and spread them on with a palette knife. The gel is pretty opaque and covered most of the paint, which is why it looks lighter. I'll go in and repaint it when it dries.

In addition, I did more work on the foreground and ceiling. I'm probably into the 9th hour of painting at this point.


This has nothing to do with anything, exactly. Believe it or not, there's a butterfly (hidden by a shadow) on the far right flower. So much for nature photography! I do love the colors in this photo, though, taken right outside my studio door, even though it's out of focus, etc.

My husband pointed out that the colors kind of correspond to my current painting.

By the way, I'm mentioning the amount of time it's taking me on this painting because I usually don't pay much attention. I just know I put vast amounts of time into every piece. The middle phase is by far the longest and hardest for me.

Tuesday, June 9, 2009

Rudeness Never Pays, or A Fresh Start in My New Studio


The boxes aren't all unpacked yet, but I needed to get back to work. Here's my easel set up with a freshly stretched and gessoed canvas, ready to go. It it scary or exciting to face that big blank surface? Well, for me, it's both.

Not only is it intimidating to mark up a white surface, but a substantial amount of time and money has gone into producing this big white surface. Stretcher bars were purchased and put together. Canvas was purchased, cut to size and stretched onto the bars. Gesso (white primer) is painted on and dried three times. Then and only then is the surface ready to use.

A few days ago, while visiting my sister in Northern California, I was probably rude to one of her friends. The friend asked me what I did and when I told her I am an artist, she said, "Oh lucky you, that must be so much fun!" I think my reply to her was "Actually, it's the monkey on my back." She was taken aback at my reply and the conversation ended abruptly.

Now, at that time, I was thinking about money (or lack thereof) and of my seeming interminable struggle to work full time as an artist. Which I've done for the last two years, but it's a precarious situation at best. I need to start selling my work in order to keep on doing what I love. So when she gave that bubbly reply, my thought was, if only I didn't have this obsession, I could be happy working at some job and cruise along looking forward to my yearly vacation and be at peace.

The normal person out there has no idea what it's like to attempt to live the life of an artist. And it's really not their fault. People don't get any art education in school. The media shows caricatures of artists, artists are portrayed as crazy, eccentric, rich and famous. No wonder the general public says dumb stuff when you admit to being an artist. And who gets to claim to be an artist? Well, anyone who wants to.

Anyway, now I feel badly that I was curt, abrupt, rude, unfriendly. I'm resolving, yet again, that when these situations come up, I will make an effort to have a friendly conversation with the person, starting with the positives, like that I'm never, ever bored.

And occasionally, I'll use this blog to show some step by step photos, so that non-artist viewers might see that a painting doesn't just magically appear.


For me, lately, my first step is to rough in basic shapes with a charcoal pencil. My first challenge yesterday was to find the charcoal pencil. Yes, I found it buried in a box. So I proceeded. The reason it's hard to see is that the charcoal is applied fairly lightly, so it doesn't interfere with the paint. I don't use pencil because sometimes the oily graphite doesn't allow the paint to stick to it.


I mix a batch of Golden Acrylic Light Modeling Paste with a mixture of paint in roughly the color I want. I spread it on with a palette knife, covering the area, kind of like spreading butter. I proceed with each area, quickly (like it takes a few hours), until the white is no longer anywhere to be seen.


After the first layer is dry, I go in with a brush, and start to add variations in the color, move things around, change sizes and angles. If you compare the two paintings, you'll see a few changes.

So here it is, probably 6 hours into the painting, and I've barely started. Now comes the long process of adding life to the painting.

Is it fun? Well, yes, when it's going well. Is it satisfying? Again, yes, when it's going well. What about when it's not going well? Well, then my feet ache, my back aches, my arthritis in my hands hurts, and I wonder why I'm beating my head against a wall.

Do I continue on? Well, yes, so far for 30 some on years, I've continued on.